Administration Settings
The Administration section provides system-wide configuration options for EZ Cloud. Access it from the main navigation by clicking the Administration (gear) icon.
The Administration section is only visible to users with administrator permissions.
Field Definitions
Field Definitions controls which fields are displayed in the invoice interface and whether they are required or exportable.
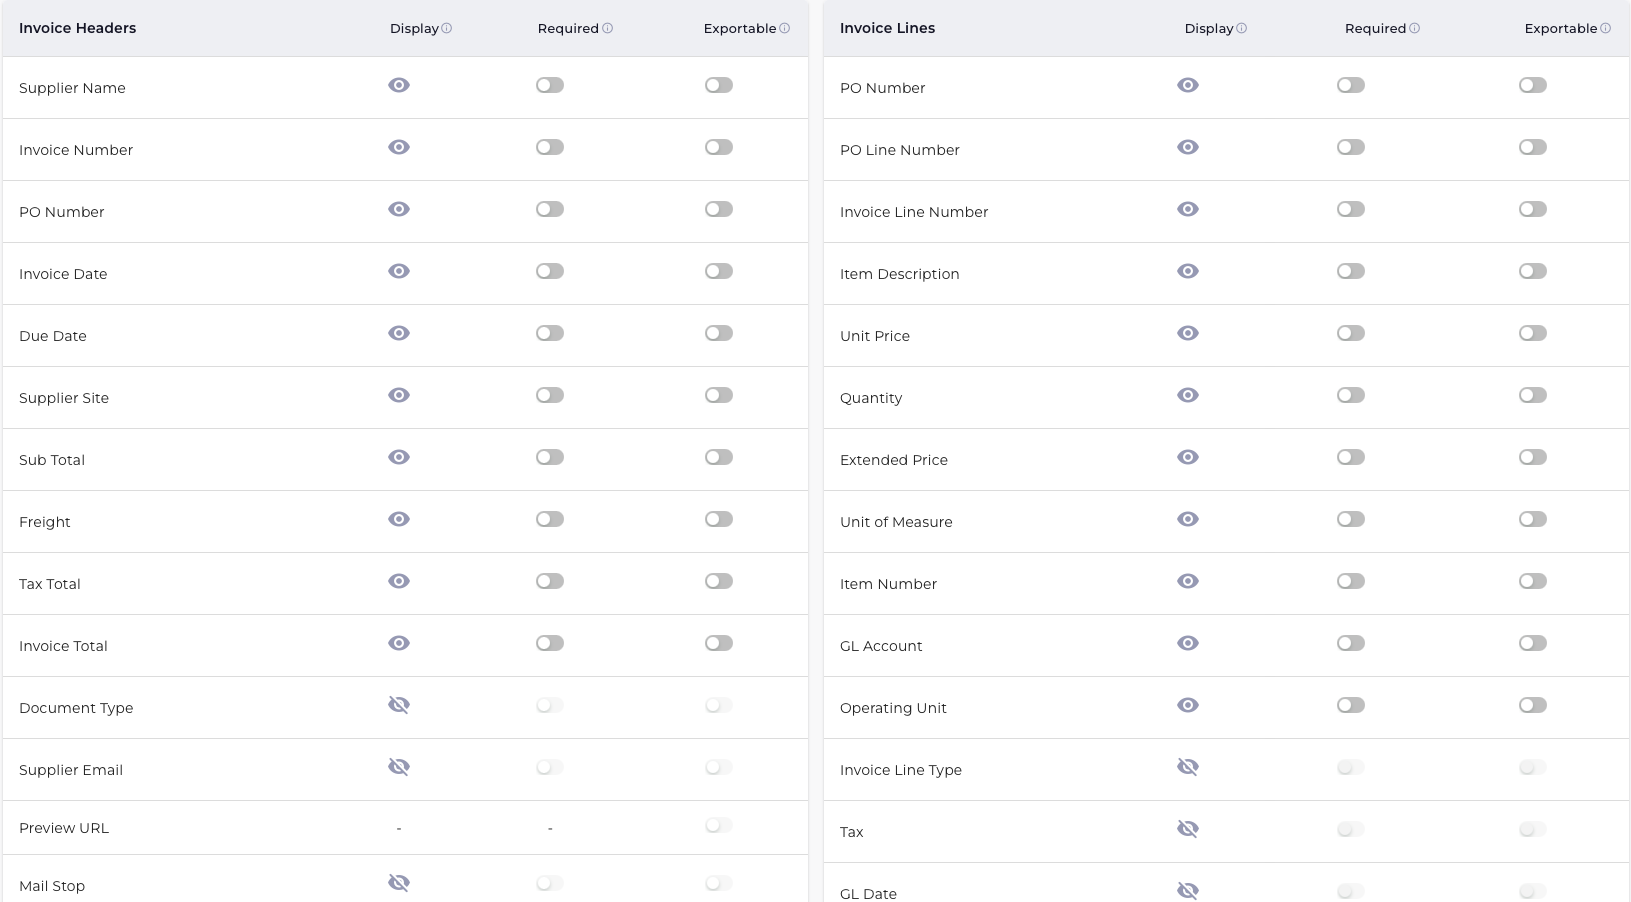
Invoice Headers
Configure header-level invoice fields:
| Field | Description |
|---|---|
| Supplier Name | Vendor who submitted the invoice |
| Invoice Number | Unique invoice identifier |
| PO Number | Associated purchase order |
| Invoice Date | Date on the invoice |
| Due Date | Payment due date |
| Supplier Site | Vendor location/site |
| Sub Total | Amount before tax |
| Freight | Shipping charges |
| Tax Total | Tax amount |
| Invoice Total | Total invoice amount |
| Document Type | Invoice category |
| Supplier Email | Vendor contact email |
| Mail Stop | Internal mail routing code |
Invoice Lines
Configure line-item fields:
| Field | Description |
|---|---|
| PO Number | Purchase order for the line |
| PO Line Number | Specific PO line reference |
| Invoice Line Number | Line sequence number |
| Item Description | Description of goods/services |
| Unit Price | Price per unit |
| Quantity | Number of units |
| Extended Price | Line total (qty × price) |
| Unit of Measure | UOM (each, box, etc.) |
| Item Number | Product/item code |
| GL Account | General ledger account |
| Operating Unit | Business unit |
Field Settings
For each field, you can configure:
| Setting | Description |
|---|---|
| Display | 👁️ Show the field in the UI / 👁️🗨️ Hide the field |
| Required | Toggle on to make the field mandatory before approval |
| Exportable | Toggle on to include in data exports |
How to Configure
- Navigate to Administration → Field Definitions
- Locate the field you want to configure
- Click the toggle for Display, Required, or Exportable
- Changes save automatically
Only mark fields as required if they are essential for your approval workflow. Too many required fields can slow down processing.
Export Definitions
Export Definitions manages CSV-based exports for integration with smaller ERP systems that don't have direct API integration.

Export History
The table displays recent export activity:
| Column | Description |
|---|---|
| S.No | Sequential number |
| Time stamp | When the export was generated |
| Type | Export type (Approved, All, etc.) |
| Invoice Received | Number of invoices in export |
| ERP | Target ERP system |
How Exports Work
- Scheduled Exports: Automatically generated based on your configured schedule
- Manual Exports: Triggered on-demand by administrators
- Format: CSV files compatible with your ERP import process
Export Definitions is typically configured during implementation based on your ERP requirements. Contact support if you need to modify export settings.
GL Definitions
GL Definitions allows you to pre-assign GL (General Ledger) codes to specific suppliers. When invoices are received from these suppliers, the GL code is automatically applied.
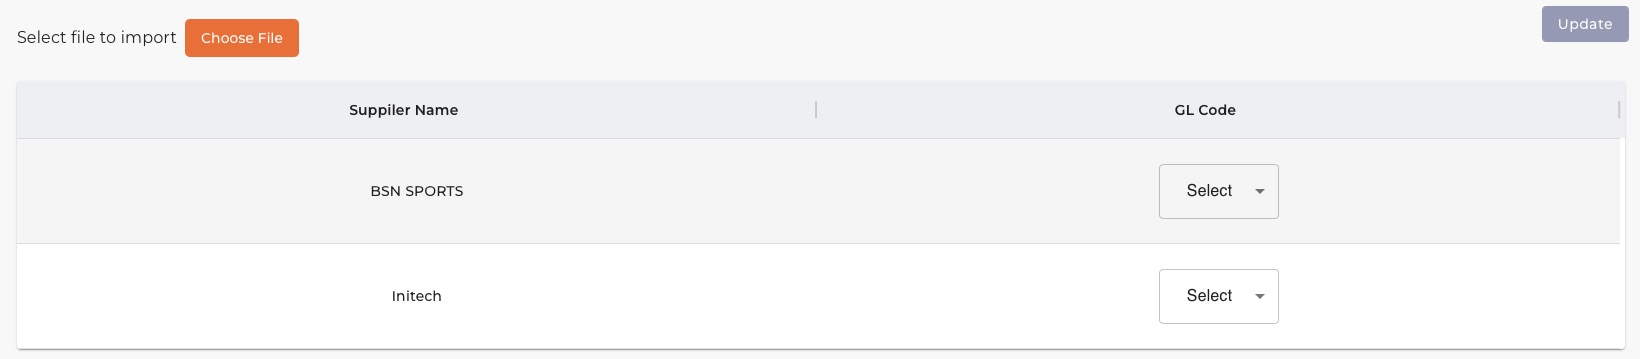
Supplier GL Mapping
The table shows suppliers and their assigned GL codes:
| Column | Description |
|---|---|
| Supplier Name | Vendor name from your supplier master |
| GL Code | Assigned general ledger account |
How to Assign GL Codes
- Navigate to Administration → GL Definitions
- Find the supplier in the list
- Click the Select dropdown next to the supplier
- Choose the appropriate GL code
- Click Update to save
Bulk Import
To assign GL codes in bulk:
- Click Choose File to select a CSV file
- Format:
Supplier Name, GL Code(one per row) - Click Update to apply the mappings
GL Definitions is helpful for suppliers who always invoice to the same account—for example, a utility company that always charges to the Facilities GL code.
Locked Invoice Management
When a user opens an invoice for editing, it becomes "locked" to prevent simultaneous edits by multiple users. Locked Invoice Management allows administrators to view and unlock invoices that may be stuck.

When to Use
Common scenarios requiring admin intervention:
- User on vacation: A user locked an invoice before leaving and forgot to release it
- Browser crash: User's session ended unexpectedly while editing
- Accidental lock: User opened an invoice and navigated away without closing
How to Unlock an Invoice
- Navigate to Administration → Locked Invoices
- Review the list of currently locked invoices
- Identify the invoice that needs to be unlocked
- Click Unlock next to the invoice
- The invoice is now available for others to edit
Before unlocking an invoice, verify that the user who locked it is not actively working on it. Unlocking while someone is editing may cause them to lose unsaved changes.
Out of Office Management
Out of Office Management allows administrators to view and manage OOO (Out of Office) status for all team members. This is useful when a user needs their OOO extended or cancelled but doesn't have system access.
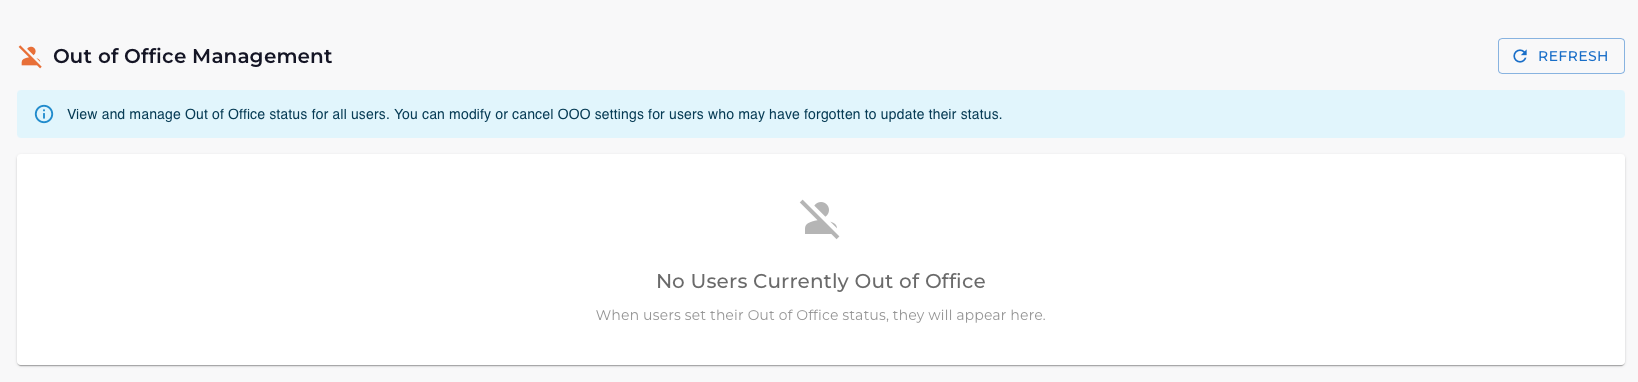
What Administrators Can Do
- View all users currently marked as Out of Office
- Modify OOO dates (extend or shorten)
- Cancel OOO status for users who have returned early
- Set OOO on behalf of users who forgot before leaving
How Out of Office Works
When a user is marked as Out of Office:
- Invoices assigned to them are automatically delegated to their designated backup
- The user stops receiving email notifications
- Their name shows an OOO indicator in the system
- When OOO ends, normal routing resumes
Managing OOO Status
To modify a user's OOO:
- Navigate to Administration → Out of Office Management
- Find the user in the list
- Click to expand their OOO details
- Modify dates or delegate as needed
- Click Save or Cancel OOO
To set OOO for a user:
- Click Add Out of Office
- Select the user
- Set start and end dates
- Choose a delegate (required)
- Click Save
Users can also set their own OOO status from Profile → Out of Office. The admin view is for managing exceptions.
Email Settings
Email Settings configures system-wide email notifications for invoice reminders and escalations. These settings apply to all users and help ensure timely invoice processing.
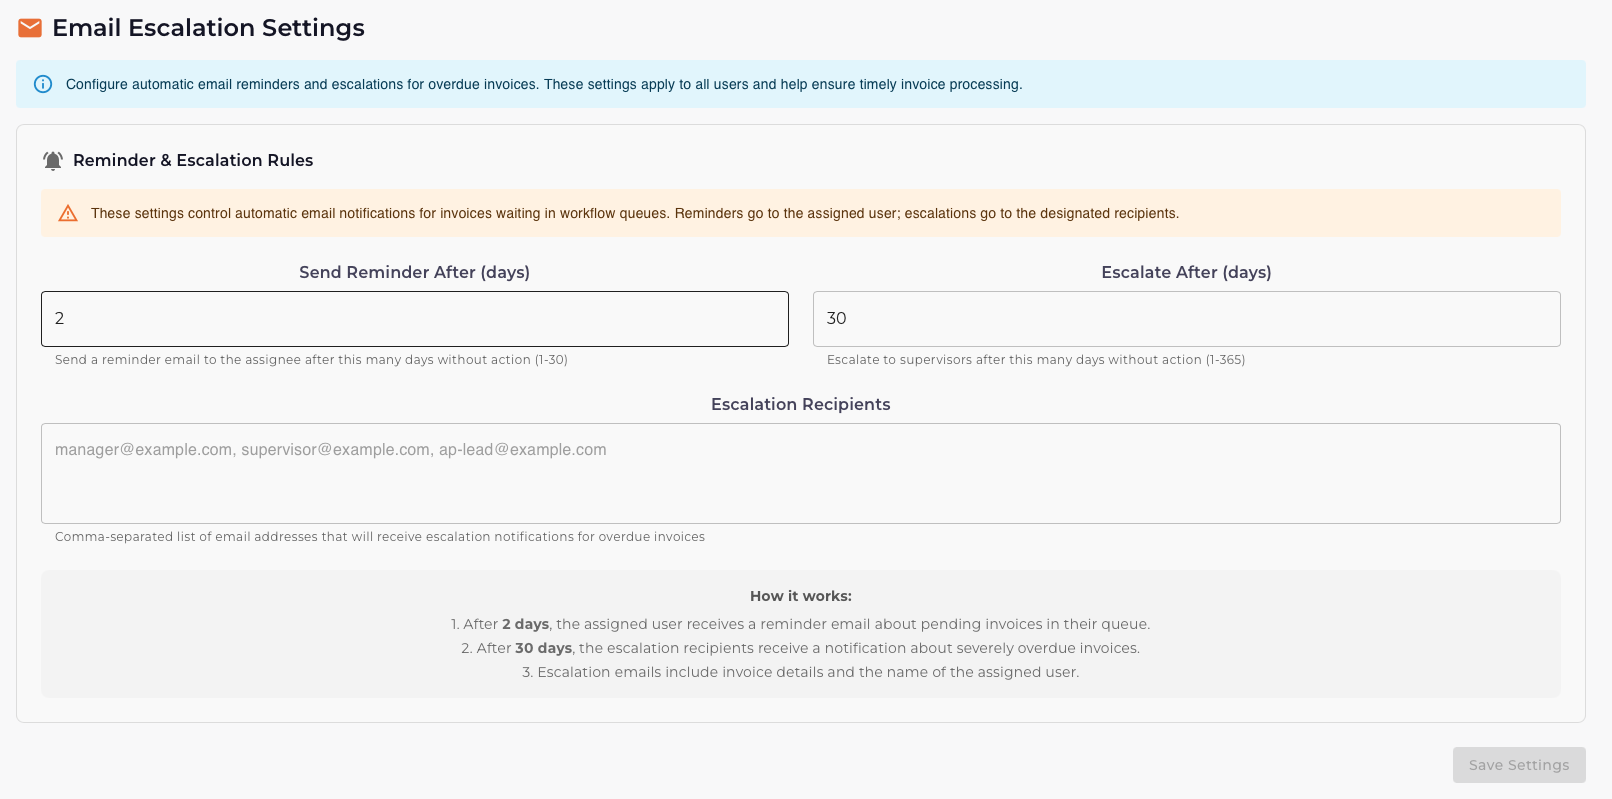
Reminder & Escalation Rules
The email system works in two stages:
1. Reminders
| Setting | Description |
|---|---|
| Send Reminder After (days) | Days an invoice sits in a queue before the assigned user receives a reminder email |
| Range | 1-30 days |
| Default | 2 days |
What happens: After the configured number of days, the user with the invoice in their queue receives an email reminder to take action.
2. Escalations
| Setting | Description |
|---|---|
| Escalate After (days) | Days before escalation emails are sent to supervisors |
| Range | 1-365 days |
| Default | 30 days |
What happens: If an invoice remains unprocessed after the escalation period, notification emails are sent to the escalation recipients (typically managers or AP leads).
Escalation Recipients
Enter email addresses (comma-separated) for people who should receive escalation notifications:
manager@example.com, supervisor@example.com, ap-lead@example.com
How It Works
The system explains the flow:
- After X days, the assigned user receives a reminder email about pending invoices in their queue
- After Y days, the escalation recipients receive a notification about severely overdue invoices
- Escalation emails include invoice details and the name of the assigned user
Configuring Email Settings
- Navigate to Administration → Email Settings
- Set the Send Reminder After days (1-30)
- Set the Escalate After days (1-365)
- Enter Escalation Recipients (comma-separated emails)
- Click Save Settings
- Reminders: 2-3 days gives users time to process while ensuring nothing falls through the cracks
- Escalations: 7-14 days for urgent invoices, 30 days for standard processing
Supplier Sync
EZ Cloud Enterprise keeps your supplier master data synchronized with your ERP system. This ensures supplier validation during invoice processing uses current data from your system of record.
Supplier Sync is only available for EZ Cloud Enterprise customers with ERP integration. If you don't see this option, your organization may be using EZ Cloud Essentials.
Why Sync Matters
Synced supplier data is used during invoice processing to:
- Match supplier names during invoice extraction
- Validate that invoices are from known suppliers
- Auto-populate supplier details on invoices
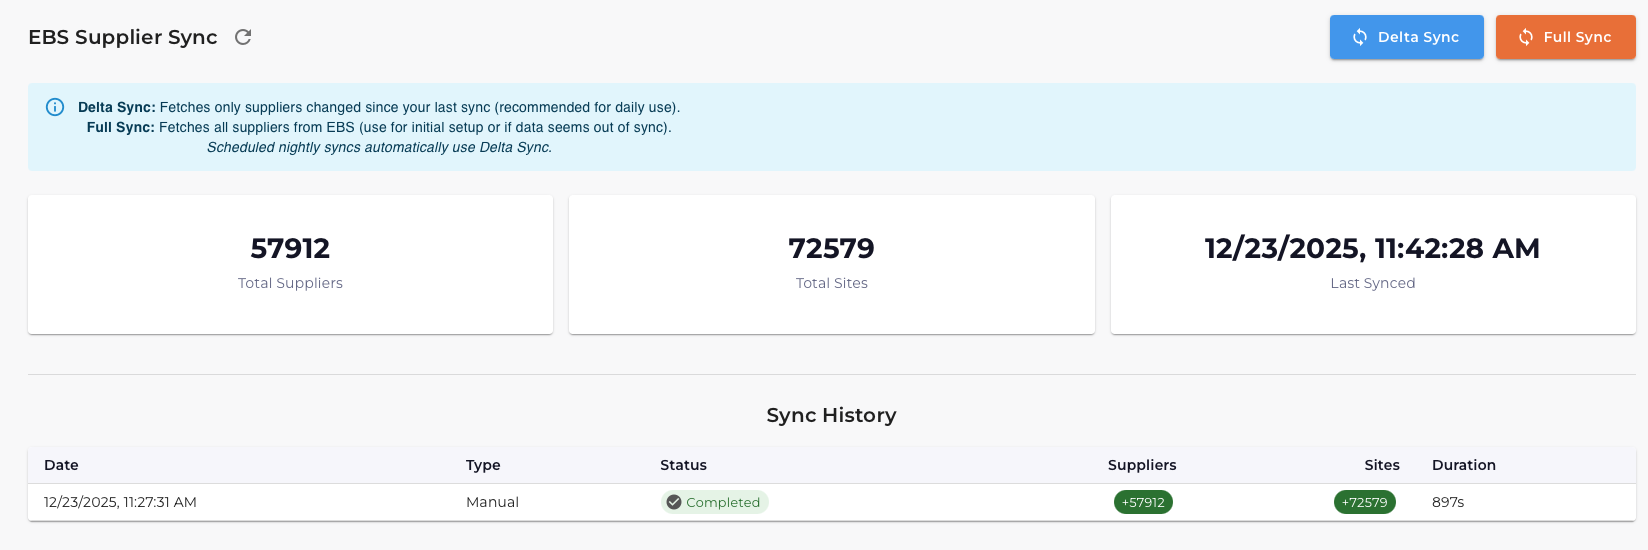
Sync Statistics
The dashboard shows current sync status:
| Metric | Description |
|---|---|
| Total Suppliers | Number of suppliers synced from your ERP |
| Total Sites | Number of supplier sites (locations) |
| Last Synced | Date and time of most recent sync |
Sync Types
Delta Sync
- Fetches only suppliers changed since your last sync
- Recommended for daily use
- Faster and uses fewer resources
- Click the Delta Sync button (blue)
Full Sync
- Fetches all suppliers from your ERP
- Use for initial setup or if data seems out of sync
- Takes longer to complete
- Click the Full Sync button (orange)
Sync History
The history table tracks all sync operations:
| Column | Description |
|---|---|
| Date | When the sync ran |
| Type | Manual or Scheduled |
| Status | Completed, In Progress, or Failed |
| Suppliers | Number of suppliers added/updated |
| Sites | Number of sites added/updated |
| Duration | How long the sync took |
Scheduled Syncs
By default, nightly delta syncs run automatically to keep data current. The schedule can be configured during implementation.
Running a Manual Sync
- Navigate to Administration → Supplier Sync
- Review current statistics
- Click Delta Sync for incremental updates, or Full Sync for complete refresh
- Monitor progress in the Sync History table
Full syncs can take several minutes for large supplier databases (50,000+ suppliers). Plan accordingly and avoid running during peak processing hours.
Best Practices
Regular Maintenance
| Task | Frequency | Why |
|---|---|---|
| Review Locked Invoices | Daily | Prevent processing delays |
| Check OOO Status | Weekly | Ensure coverage during absences |
| Verify Email Settings | Monthly | Confirm escalation recipients are current |
| Run Delta Sync (EBS) | Automatic nightly | Keep supplier data current |